Wednesday, July 14, 2010

Weekend...

On Saturday, we went to Valhalla Vineyards with some friends. It was a beautiful day up on the mountain. We went on a tour of their wine cave.


Isn't it beautiful and glowing? It makes me think of Harry Potter. I think I can see him, wand raised, in the very back ;)


The Gnome's birthday was Monday, and we went to a minor league baseball game in town with some friends to celebrate. It was dollar admission and dollar hot dogs! There was lots of t-shirt shooting into the crowd, rubber chicken-catching, a dance contest, cornhole games, and our local team won! The Gnome's b-day cake was yellow cake with chocolate chips and chocolate buttercream frosting. I piped a "31" on the cake and filled it in with mini chocolate chips.


In vegetable news, we have ripening tomatoes!


Must get ingredients for salsa!


In crafting news, I've been looking for a new glue gun because mine is dinky and wants to fall over all the time. After Lollychops mentioned her new one, I went on a hunt for it as well. I had one failed trip to Tuesday Morning when they were closed for inventory, but I went back, and found that they had a whole shelf full of Dremel glue guns :) Now, to figure out a crafty project to put it to good use.


Leaf out.

Tuesday, July 6, 2010

Back in Action

Last week, my mom and I went on a trip to the Outer Banks. We stayed in Kitty Hawk and had a fabulous time. The weather wasn't great while we were there, but we still had a fun time. We went to the beach, the pool, hit the tiki bar, watched a movie, played Uno, and went to the outlets. I wanted to stop in and check out the local yarn shop in Nags Head, Knitting Addiction. It was a really cozy shop with couches, comfy chairs, and a kid's play area. AND they have a resident cat, a lovely gray kitty named Purrl (what an appropriate name for a knitting shop cat). I managed to leave without any yarn, but I did buy a great book of patterns. 


Of the restaurants we tried, my favorite was Kill Devil Grill. The food was awesome, and while it was a little loud in the dining area, it had a great old-fashioned diner atmosphere. Mom got chicken piccata, and I got crabcakes. Mmmmmmmmmmm. In fact, I ate seafood for every dinner we had because I live in the mountains where the seafood isn't so great or available. Barefoot Bernie's was fun and delicious as well. We shared a hot crab dip appetizer and both got steamed shrimp for our entrees. We also went to Rita's Ice-Custard-Happiness two out of the four days we were there. I wish we had a Rita's in Roanoke. Is there someone out there that wants to start a franchise here? 


I loved the foot-washing station they had at the hotel. Maybe I just don't get out a lot, but I had never seen one of these things before. Here it is:
You step on, and the water automatically comes on to wash the sand away. Sand be gone!


When I got back to the mountains, I found lots of tomatoes, flowers, green peppers, and lettuce. Here are some photos of the status of the deck garden (all started from seed and featured in a previous post):


Maters (Roma)

Teeny Green Peppers

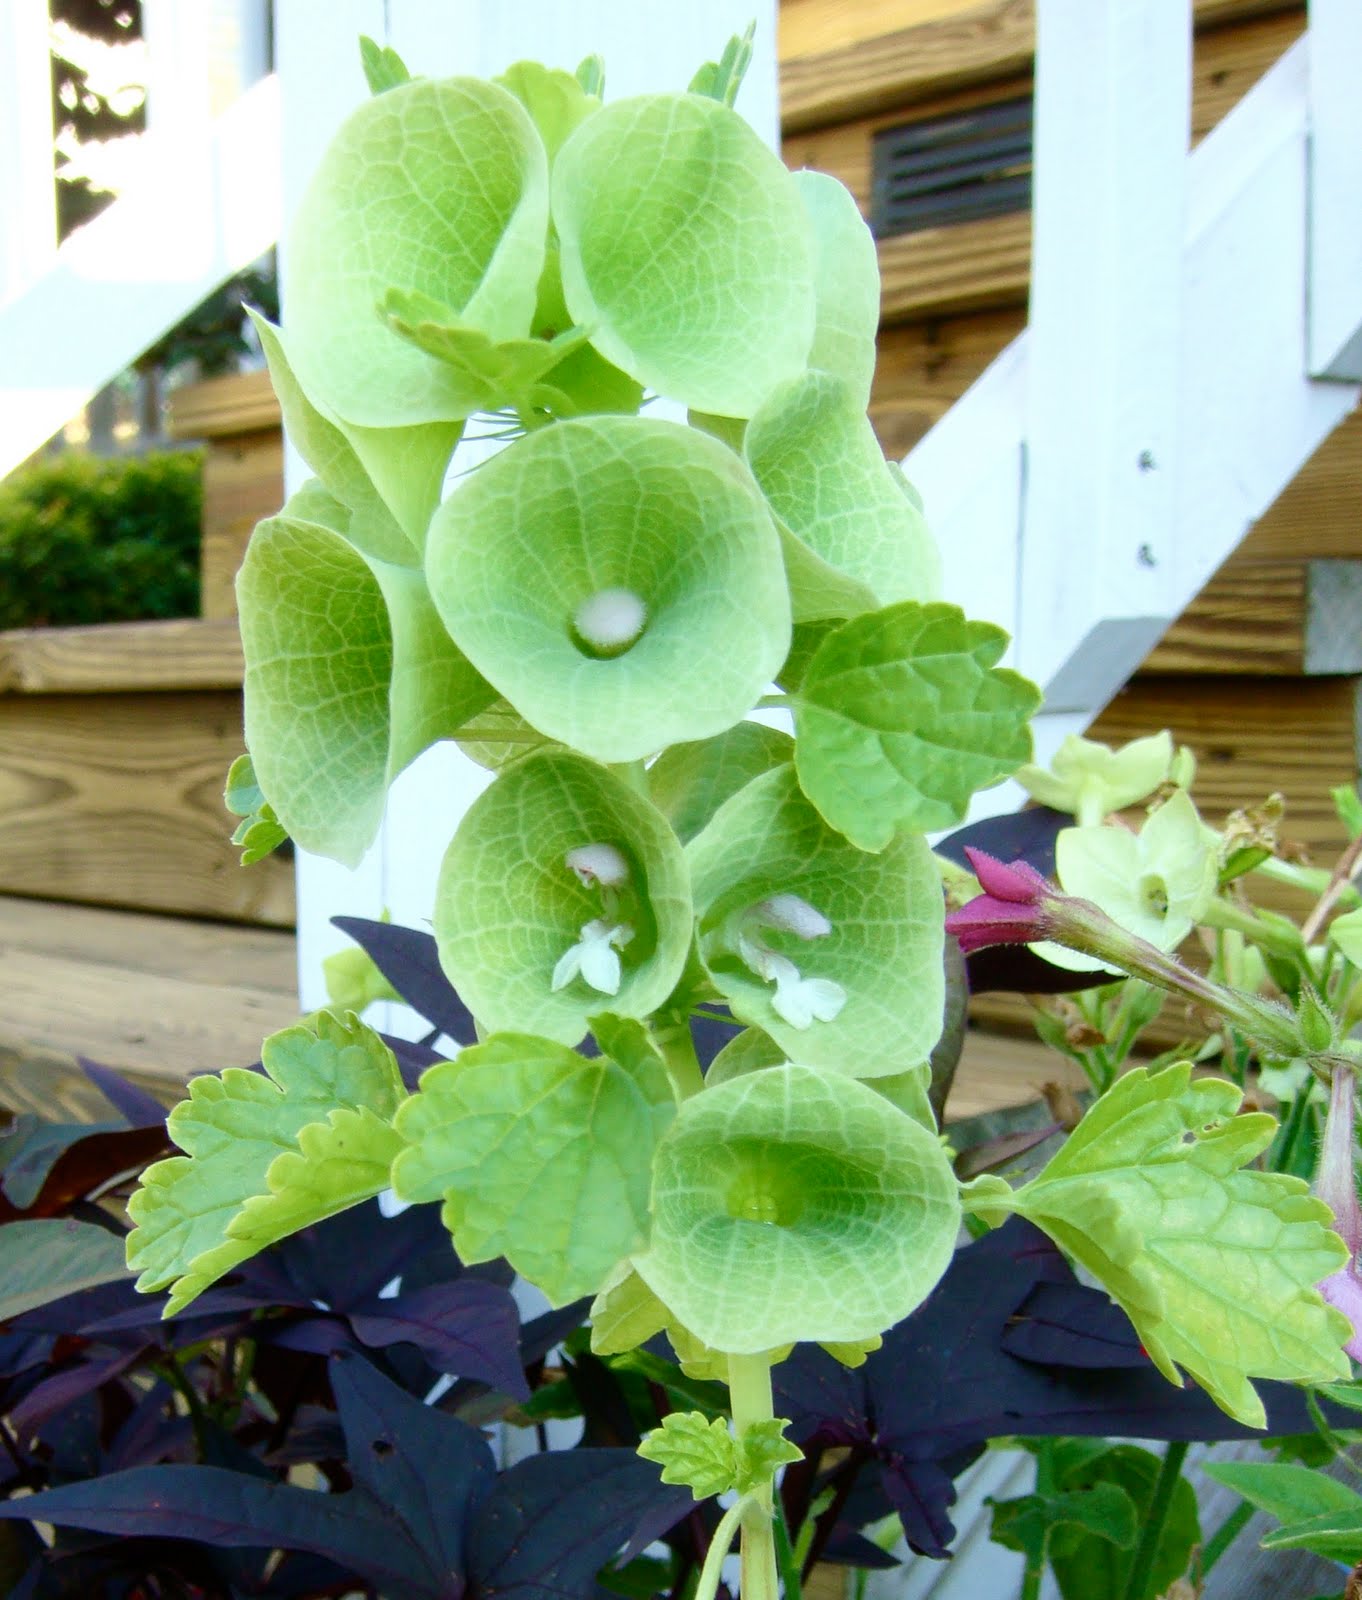
Bells of Ireland, Molucella laevis (ain't they perty?)


Lettuce/Mesclun 
(it grew like crazy whilst I was gone cuz no one was cutting it)

Bachelor's Button or Cornflower, Centaurea cyanus

Now, it's time to get crafty!


Leaf out.

Thursday, June 24, 2010

Little Leaf Cake

Well, I am finally done with my Wilton classes. For this last set of classes, we didn't have to make a cake until the final class. AND we could design it however we wanted! Hooray! I was racking my brain trying to figure out what I should do when it occurred to me: an Orla Kiely cake! 

Orla Kiely, for those of you who don't know, is an Irish designer with a clothing line as well as purses, travel, homeware, and stationery. You may have seen some of her stuff in Target a year or so ago. Many of her patterns are floral or leaf motifs so of course I love her stuff. I couldn't find a leaf fondant cutter in the shape I wanted so I googled "making cookie cutters." I used this wikiHow article to make my own cutter. I printed out a bit of this Orla Kiely leaf pattern (my inspiration :) and cut out a leaf as a template. Then, I cut some floral foam in the shape of the leaf to use for molding the aluminum in the shape I wanted. I removed the foam, added a couple of staples to secure, and voila! My very own fondant cutter. It cost me about $5, and now I have a giant lasagna pan with a hole in the bottom (very useful, I know) and some leftover floral foam for future projects. Score!


Enough of the babbling, here is the cake! (with my Orla bag):


I couldn't get the fondant as smooth as I would have liked, but that's because it chose to stick to my mat despite my greasing it. Oh well. It's still pretty cute.

Leaf out.

Tuesday, June 15, 2010

Scrappin' with the Queen Bees

Saturday (through the fierce wind and rain), I traveled to the other side of town to go to a "crop" (aka scrapbooking group) hosted by the Queen Bee Croppers. I have never done any scrapbooking and thought that I wasn't interested in ever doing any (I can hear you asking, "why did you go to a scrapbooking meetup then?"), but now I'm starting to think that it might be fun. You should have seen the ginormous piles of photos these ladies carted with them to the meetup. One of the croppers had completed a 4-inch-thick photo album from their family trip to Disney World and was working on a second one for the same trip.


It was great to meet some new people, and most of what I did while I was there was talk and watch what everyone else was doing. I made one Father's Day card in the four hours that I was there. The only problem with me picking up scrapbooking as a hobby is that I hardly ever take pictures. I take my camera with us whenever we go on a trip, but then I never think about documenting anything. It would be pretty difficult to scrapbook with no pictures. I'll have to work on that.


In shop news, I have 10 sales! And 28 fans on FB! Thanks everyone for your support!


Leaf out. 

Monday, June 7, 2010

Have you gotten a Father's Day card yet?

No? Then, make one!

I always have problems figuring out what to do for Father's Day. Pops can never come up with gift ideas so I always have a hard time coming up with something for birthdays, Christmas, or Father's Day. And the same goes for card ideas. I came across a couple of handmade wallet cards the other day and decided to come up with my own wallet card that includes a pocket for a gift card. I recently made this card for my brother-in-law's birthday (I put his initials on the front instead), but I thought it would be appropriate for Dad's Day as well. I chose brown for my card, but if some other color strikes your fancy, go for it! 


The closed card measures 4.25 inches by 5.5 inches (A2 size). You will need to cut 4 pieces of cardstock. Three for the body of the card and one for the insert. Cut the following sizes: A - 4.25 x 11 inches, B - 3.75 x 11.5 inches, C - 4 x 2 inches, and D - 3.5 x 10 inches. A, B, and C should be the same color.
For the outside of the card, score piece A down the middle at 5.5 inches for folding.
Score piece B for folding at 5.75 inches. Then, score 1/4 inch from each short end and again 1/4 inch from the bottom (one of the long sides) of the card. 


Score piece C for the gift card pocket 1/4 inch in on each short side and 1/4 inch in on one of the long sides. This is what both pieces should look like after all of the scoring fun:
To make things fold more easily, on each of the bottom corners of piece B and C, draw a line across the corner creating a triangle. 
Cut along this line for each corner. This is piece C after the corner cuts:
For piece B, there is one additional cut in the center. Draw two lines (creating another triangle) down from the center score starting at the bottom score level. Hmm not sure if that made sense...please see picture below :)
Cut along those lines, and you will have this:
Now, fold those edges! (on both B and C, please). Oh! And fold piece B in the middle in the opposite direction of the flaps. 
Apply adhesive to the folded flaps.
Attach piece B to the inside of piece A making sure to match up at the center fold.
Now, to add the gift card pocket! Apply adhesive to the flaps on piece C and attach to the inside (right or left, whichevs you want) of the card making sure to center it.
I got a little ahead of myself and already put the insert (piece D) in the card. Before you do that, score piece D down the middle at 5 inches for folding.
Now, for some pizazz! Stamp or write whatever you want to say on the insert. I chose to put a "Happy Father's Day" sentiment as well as some trees (Stampin Up Funky Forest std roller).
On the front and on the inside, I added some faux stitching with a silver gel pen (I just used a piece of cardstock as my straight edge to make short repeating lines or "stitches").
There you have it! 


*If you have any questions about my instructions, leave a comment or email me, and I'll be glad to help :) 


Leaf Out.


Sunday, May 30, 2010

This way for the tour...

I shared some pictures of my craft closet makeover last week so I figured I'd post some pictures of the rest of my craft room.


Here is my crafting table:


Many of the things in my craft room originated in Sweden (Ikea). I keep all of my punches on metal bars I got at Ikea (this idea came from Mary over at Stampin' Pretty). They are within easy reach and facing out for quick choosing. Other often-used tools are either on hooks hanging from the bar or in a pencil cup mounted to the wall to the right of the bars. I also keep some items on the table in a napkin holder a friend bought me in Paris (Thanks again A!). My Stampin' Up stamp sets are all in the black and white storage boxes under the desk.


I have black fabric-covered storage boxes for my collection of felt and Cuttlebug and Sizzix dies. The dresser in the corner serves a storage role as well as being a perch for my TV and DVD player and my Cuttlebug. This particular dresser was obtained and refinished by Mom G when she was in college.
The metal rack next to the window is actually meant for a bathroom, but I stole it for my craft room since there was really no place for it in our bathroom once we moved. It holds my ginormous jar of spools of thread and my collection of buttons (my grandmother was a great seamstress and had a huge collection of thread and buttons in these jars). The rack also holds a couple of my many plants. There's a law in our household that states there must be plants in every room. In fact, we even have a room in our house that we refer to as "the plant room" since it contains mostly plants with the exception of a couple pieces of furniture. But I digress.


My Singer sewing machine sits on top of this old sewing machine table I got on Craigslist for a whopping $10. I fancied it up by spray-painting the handles. The bulletin board is covered in a Project Runway button print, and the frame is also spray-painted to match. The file box down below hold all of my magazine pages that I tear out for gardening and crafting ideas.


This little box sits to the right of my sewing machine. It is my favorite thing from my grandmother's house. It still holds her sewing scissors, her tomato pincushion (full of needles), and all sorts of sewing odds and ends. I just love the look of it and its tiny gnome, flower thimble holder, and mushroom pincushion. It was made in Japan. I think it originally had some kind of handle because there is a hole on each side in the middle.


Just for good measure, here is a picture of the craft closet again. I have added something since I posted last week. See if you can figure out what it is...
The tour ends here. Thanks for joining me :)


Leaf out.


Tuesday, May 25, 2010

Party in the SWVA


The Gnome and I were invited to two cookouts this past weekend: one to celebrate a friend's 30th birthday and the other to celebrate a couple's 1st anniversary. I made the same dessert to take to both parties: a fruit pizza. I got the recipe from allrecipes.com: Fruit Pizza II. I used reduced fat cream cheese and lite Cool Whip for the pizza "sauce." I went fruit shopping on Friday to get the supplies and got raspberries, blueberries, kiwis, and pineapple. Of course, we already had a surplus of strawberries from our strawberry picking extravaganza. Here is fruit pizza #1 (pic from camera phone):
Do you see the hidden message? Well, do ya? It took people at the party a while to notice. I think it's probably easier to see in the picture.


And fruit pizza #2:
It has an orange juice/lemon juice/sugar sauce drizzled on top. Someone brought oatmeal raisin cookies to party #1. One party-goer had the crazy idea to dip the cookies in the extree sauce I brought. This led to much cookie dipping that would likely rival oreos and milk. Try it sometime...you might love it :)


Also, I forgot to share my most recent cake decorating feat. I made a fudge marble/chocolate buttercream cake for some friends that are departing for CA next month. We will be sad to see them go, but hopefully this will motivate us to go on a trip to CA. Their names are Holly and Zach, and since they are moving back to CA near LA, I thought it would be fitting to decorate the cake to look like the Hollywood sign using their names. 
I got the Gnome to make me a template and print the text out flipped backwards. I traced it onto wax paper with clear piping gel and transferred it onto the cake. Then I just traced away with my icing. After piping a billion stars to fill in the "mountain," I finished the bottom of the cake with a rope border. My mom saw the picture of the cake and asked, "what is the significance of the brown top and green bottom?" So I guess it wasn't completely obvious what I was trying to depict. Oh well. Maybe it's because there was no sky...